Thursday, December 1, 2016

Willand Pond Nature Walk

Willand Pond
I literally drive past this walk everyday and up until last week, I had never actually gone.  I've mostly ignored it before because unlike my usually mountain hiking, it's a flat, easy nature walk.  This turned out to be the perfect outing with my friend Courtney and her 2.5 year old.  With the easy trail, and things to see like trees, beach, and bridges he (and we) were entertained.

Here's how to recreate this adventure...

Adventure: Willand Pond Trail

Getting there:  I accessed the trail on Rt 108 on the Dover/Somersworth Line.  The trail starts at the Willand Pond Boat Launch that is located across the street from Strafford Farm Restaurant.  There is a parking lot at the trailhead/boat launch but no bathroom facilities.


Bog Bridges
Trail:  The trail is a flat dirt path.  I would say it is fairly wheelchair accessible (and stroller accessible).  The trail winds along one side of the lake.  It is not a loop.  There are benches along the way as well as calisthenic stretching/exercise stations.  After (my guess) about a half mile, there is a picnic area on the lake.  We weren't able to travel the whole trail since the toddler got tired, but we crossed paths with families, singles, and dog walkers all enjoying the trail.

Difficulty: Easy

Distance: 1.0 miles one way (2.0 miles out and back)


Recommendations:

- Dogs are allowed on the trail if they are leashed, however, be prepared to see unleashed dogs.

- It is a popular local fishing spot.  Be prepared to see boats, fishermen, and recreationalists.

Photo courtesy of Willand Pond Facebook Page
- It can be crowded in the summer but was pretty quiet on a cool, November day.

- Consider enjoying breakfast at Strafford Farms before your walk - that's what we did!

- Parking is free. There are no bathrooms.

I enjoyed exploring this nature walk close to my house.  It's always refreshing to get a respit from the town/city with a little patch of nature.

Enjoying the beach

You might also enjoy these similar adventures:

- Winnie the Pooh Trail in Barrington, NH

- Stonehouse Pond Loop in Barrington, NH

- Stratham Hill Park in Stratham, NH


Wednesday, August 24, 2016

Stonehouse Pond Loop

Stonehouse Pond and 150 foot cliff face.
My parents were in town visiting last weekend from Oregon.  When I asked my mom what she wanted to do for the day, she replied, "I don't know.  Walk around a pond or something?"  Matt new the perfect place to go on a summer day - Stonehouse Pond in Barrington, New Hampshire.  
Matt is very familiar with this piece of NH Fish and Game property because he has frequently climbed and ice-climbed the 150 foot granite cliff on the far shore.  It's also a well known spot for anglers as it is stocked with brook trout.  The hike around the pond is a short one (my guess is about a mile) and provides views of the pond and surrounding area from the top of the cliff.  It was just what my mom was looking for and we all enjoyed this local little hike.
View from top of Stonehouse Pond Cliff
Here's how to recreate this adventure...

Adventure:  Stonehouse Pond Loop Hike in Barrington, New Hampshire
Sign from Route 9/202

Getting there:  The Pond is located on Route 9/Route 202.  From the Lee Traffic Circle, take Route 4- East for seven miles.  Take a right onto Cooper Hill Road.  After about a mile it will connect to 202 East.  Turn right onto 202 East.  After a mile, turn right onto the dirt road.  There is a large wooden sign marking STONEHOUSE POND.  Drive to the end of the dirt road where there is a parking area.  There is no cost to park and no bathroom facilities available at the trailhead.  Stonehouse Pond can be found using an iPhone or Google Maps as well.

Matt checks out the view on our hike.
Trail:  Unfortuantely, the trail is not well signed or marked.  There are many footpaths, offshoots,
Trail
and choices when going around the pond.  It's sort of a choose-your-own-adventure.  We stuck to the most well worn trails, keeping the pond always at our right.  The trail is fairly easy until you start "climbing" to the cliff.  Here, the trail got steep and uneven.  After about a half mile, we emerged at the top of the cliff.  **Be careful not to throw rocks or objects off since it is both a popular climbing and swimming area below!

After enjoying the view, we again had to choose a trail to decend.  Our first choice turned out to be quite steep so we returned to the top and then hiked down another one.  I could see it being easy to get a little lost since non of the trails are signed or blazed.  Take are to look for landmarks and give yourself plenty of time and provisions to return.

Difficulty:  Moderate.  There are some steep areas when climbing up and down the cliff.  Because of the numerous trails, it's possible to take a steeper or more challenging trail.

Distance: About 1 mile loop.

Enjoying the view from the summit of the cliff.
Recommendations:

- Even though this is a short hike, bring proper hiking footwear and provisions (water, snack, and rain gear).  

- Take care around the cliff.  Do not through objects from the top.  The cliff face is a popular climbing spot and there could also be swimmers or boats below.

- There are no bathrooms or water at the trail.  Plan accordingly.

- The dirt road to the parking lot is covered in deep pot holes and can be difficult terrain.  Take care!

"Walking around a pond" was the perfect family weekend activity and Stonehouse Pond was the perfect place to do it.  On the way home, we stopped at Calef's Country Store  on Rt 9/125 intersection for a giant pickle and Moxie. What is more New England than that?

Three Generation Selfie at Stonehouse Pond
You might also enjoy these adventures:


Monday, August 22, 2016

Winnie the Pooh Trail - Perfect for the little ones

Views from parking area at Winnie the Pooh Trail
I heard about the Winnie-the-Pooh trail in Barrington, New Hampshire a few years ago.  Without kids at the time, I didn't have an incentive to visit the child-focused interpretive trail.  Now that many of my friends have traded their subarus for minivans, it wasn't hard to find a friend to explore the trail with a toddler.  The well signed and maintained nature path turned out to be the perfect way to spend a summer morning.  The visit to the hundred acre wood and the "homes" of Pooh and his friends kept the interest of the two-year-old and the my friend Courtney and I enjoyed the views and hike.

Sign from Route 9
Here's how to recreate this adventure...

Adventure:  Winnie the Pooh Trail in Barrington, New Hampshire

Getting there:  The Winnie the Pooh Trial is located on Goodwill Conservation Land in Barrington, New Hampshire.  To get there from Rochester, New Hampshire - take Route 125 South to Route 9.  Take a right on Route 9.  The parking area for the trail is located about 1.5 miles down Route 9 on the left.  There is a sign marking "Goodwill Conservation Area" but it was hidden behind trees.  Drive slow and look for Richardson street.  It's right after.  Parking is free and there are no facilities at the trailhead.


Trail Map
Our little hiker visits Piglet's house!
Trail:  The trail sign at the parking area provides a signed trail map.  The Winnie-the-Pooh trail is marked by white blazes.  It's well designed so that every 20-50 feet, there is a new "stop" for children.  From the parking lot, you'll see a beautiful pond.  Cross the stream on the bridge and start traveling to the "homes" of Pooh's friends.  Our first stop was Christopher Robin's house.  There is a child-sized door nailed to a tree.  Courtney's son enjoyed knocking on the door to see if he was home.  We decided it was such a nice day, he must be out playing with friends!  The walk continues, visiting characters and scenes from the Winnie-the-Pooh trail.  Although our toddler wasn't familiar with the story, he still enjoyed visiting site to site.  At the end of the trail, you reach Pooh's house with three "honey jars" up on a rock.  The little guy loved climbing the rock to the jars. We decided to return the same way, although according to the trail, it looks like we could have taking the Goodwill trail back.

The actual trail had an easy, soft terrain with a few roots and rocks.  We saw other families and children on our walk back.  Although the mileage wasn't marked or posted, I'd estimate it was about a mile out and back.

Knocking on Christopher Robin's door.
Difficulty: Easy - our two-year-old hiker handled it just fine!
Pooh's Honey Jars

Recommendations:

- There are no bathrooms or water at the trail head.  Bring water, snacks, and rain gear.

- I have had a friend try to return on the Goodwill trail and end up getting lost.  I recommend taking a photo of the trail map with your phone and be careful to follow the signs and blazes.

- Parking is free.  We showed up at 9 am on a Thursday and were the only ones in the parking lot. When we left at 10 am, there were four cars.  I'm not sure how crowded it gets on weekends.

Signs for trail
Even though the trail was easy and short, I still enjoyed getting outside and the scenic pond and forest views. I look forward to enjoying this trail again in a few years when Lucien is old enough to walk it!

You might also enjoy these adventures:

- 3 Family Friendly Nights in Acadia National Park  

- MacWorth Island - Easy Family Trail with Beach, Forest, and Fairies!

- Winter Walk on Gonic Trails

Baby Lucien loved the Winnie the Pooh hike!

Monday, August 8, 2016

Sisters Wilderness - Green Lakes Trail near Bend

Waterfall off spur on Green Lakes Trail
On my recent Oregon trip, I was lucky enough to spend three nights outside of Bend.  My family rented a beautiful home on the Deschutes river.  We spent most of the time sitting on the porch, watching the lazy river take tubers and paddlers by our deck, and sipping on a glass of wine.  It wouldn't be a real Freelance Adventurer vacation, however, without a sturdy hike.  This time I went with my parents, husband, and baby to hike the Green Lakes Trail.  This 9.3 mile out-and-back trail was a little too much for a 90 F afternoon, but we did enjoy over two miles in with views of river, waterfalls, and mountains which made the perfect hike.

Here's how to recreate this adventure...
Trailhead

Adventure:  Half Way Up the Green Lakes Trail (and back).

Getting there: The Green Lakes Trailhead is located 27 miles west of Bend on Century Drive.  It has a large parking lot (and overflow lot) but the lot is not marked.  There is an outhouse and well marked trailhead at the end of the parking lot.  Visitors must have a national forest parking pass.

Trail: The trail starts from the parking lot.  There is a sign that marks the way.  We initially crossed Fall Creek on a log bridge and then steadily walked uphill.  The moderate trail was dusty and graded.  There were few obstacles.  It winds through a pine forest and stays parallel to the river.  After about 30 minutes of walking (maybe 0.5-1 mile up), we took a spur path on the right to see an impressive waterfall.  The spur was not marked, but listen for the water noise increase (it wasn't visible from the trail).  The steep 50 ft spur trail takes you down to the base of the falls.  The spray felt AMAZING on the hot day.  Continuing back up, we reached the intersection of Moraine and Green Lake Trail at 2 miles.  We went a little further and were rewarded with views of a meadow, wildflowers and nice views of Broken Top Mountain.  After a water and snack break we decided to head back.  All-in-all I think we did about 5-6 miles.  It was a wonderful hike and I'd love to go back and make it to the lakes!

Horses and Dogs are allowed on the trail.


Log Bridge at start of trail
Difficulty:  Moderate

Recommendations:

- Bring lots of water!  We traveled on a July day that started in the 60s and ended in the high 90s.  It was dry and hot!  There was no water available for refill at the trailhead.

- Get to the trailhead early.  It was a popular hike and even at 10 am the parking lot was packed.

- Dogs and horses are allowed.


We loved our family hike with three generations!  It was a great way to enjoy central Oregon Cascade views and get outside!


Fall Creek and South Sister in the Background
View of Broken Top Mountain

You might also enjoy these adventures:
Crossing another log bridge


- Crossing the Cascades

- Oregon Coast Day Trip

- A Day at Cannon Beach

- Portland, Oregon - Bikes, Beers, and Baristas


Fall Creek Cowboy

Tuesday, July 19, 2016

Gear Review: Baby Bjorn One Outdoors Baby Carrier

Hiking with Baby Bjorn One Outdoors Carrier
Photo by Leanne De Craene.
My new leap into motherhood has brought a whole new level of hiking-gear obsession.  As most middle-class mothers have done, prior to the birth of my son, I agonized over which type of baby carrier to invest in.  For those of you who don't know - these things aren't cheap - the average (quality) soft carrier ranges from $50-$300 and each one comes with advantages and limitations.  In the end, thanks to generous friends I ended up with three top-notch carriers.  Unfortunately, it turned out that while they all were great at something...none were great for what I needed...hiking

Other carriers didn't cut it for summer hiking.
From left:No hip support, too stretchy/not enough support,
 too hot/can't wear a pack.
I originally tried a popular soft carrier that my baby's legs could dangle down in. I loved it's simplicity and baby Lucien loved how comfortable it was.  Unfortunately, about the time when he was able to face outward in it, it became uncomfortable carrying him.  With no hip belt and little shoulder padding, it was too painful for a multi-hour hike.

Next I tried a wrap system.  Although this is my favorite for around the house, it didn't work for hiking either.  The stretchable jersey sagged after long walks.  Not to mention - with baby pressed up against me, we both turned into sweat machines in minutes after increased exercise.

Finally I though I had it made when I got a drop-in carrier with a massive hip belt.  Sure, my shoulders didn't hurt anymore, but the giant shoulder pads made it so I couldn't carry Lucien AND a backpack.  Where would I store water, diapers, and snacks? This carrier also placed baby against me directly which made us hot on summer hiking days.

I felt like I was in some momma-hiking version of "Goldilocks and the Three Bears"....I needed to find a carrier that was "just right".  Right when I was about to give up on treks with my boy, I found out that Baby Bjorn was coming out with a new carrier - a hiking specific soft carrier!  They agreed to let me gear test it.  Here is what I found...

Item:  Baby Carrier One Outdoors by Baby Bjorn (in turquoise)
Hiking in Acadia with One Outdoors.
Photo by Leanne De Craene.

The Basics: According to Baby Bjorn's website, this carrier is specifically designed as the "perfect hiking baby carrier".  It works for age newborn to 3 years, is considered a 'hip-healthy' carrier for baby, and has options for 4-way front and back carrying.  The material is a mesh-hybrid which is designed to let air flow (preventing the sweaty problems), and comes with a travel bag and hip belt pouch - perfect for a smart phone.  Color choices are turquoise and black.

Test Adventures:

My initial test of the Baby Carrier One Outdoors was a 4 day trip to Acadia National Park with my girlfriends. I averaged 5-10 miles of hiking a day plus in-town travel.  Lucien probably spent a total of 30+ hours in this pack over the course of the trip.  I took him on easy to challenging trails (See post about trip HERE).

Lucien was 2.5 months at the time of the initial gear test, but he was really long for his age - over 25 inches.  The pack had two options for where he sat in the carrier and he was just too tall for the infant position.  I was easily able to zip him into the larger 'pocket'.  I tested it as a front carrier in both the inward and outward facing options.  **Note - the manufacture recommends you don't try outward facing until 5 months but Lucien was fine holding his neck for short periods of time in it.  At this time, my baby is too small for back carrying so I haven't been able to test that (yet).

Acadia with Baby Bjorn One Outdoors.
Photo by Leanne De Craene
My priorities going into the test was to look for a few things that I wasn't getting in my other carriers.  Here were my questions:

- Carrier Comfort - Can I wear it for 4-6 hours without pain?  Does it distribute weight onto hips and shoulders?  Does it adjust to different body types?

- Baby Comfort - Does my baby sit well in it?  Is it comfortable for him?

- Breathability - Are my baby and I going to be instantly covered in my sweat when I start climbing a mountain?

- Difficulty Using - Can I get it on and baby in by myself?  Can I quickly take it on and off when I need to diaper change, nurse, get in-and-out of the car?

- Storage/Pack - Can I wear a backpack AND the carrier?  Does it provide storage for items for a short walk?

After 4 days and 30+ hours of hiking I found my answers...

Advantages:
Trying the face out option.

Carrier Comfort - I had HIGH expectations for this carrier that claims to be "the perfect hiking baby carrier" and after my initial test, I agree that it is the best soft carrier on the market for hiking.  The weight of my baby was distributed between my hips and shoulders.  I was incredibly comfortable hiking multiple hikes a day for many days with this pack.  I'm 6'1" so I was nervous about it being long enough for me, but I didn't have any issues.  I wore the "hip" belt more like a waist belt so I'm sure on a shorter torsoed mommy it would sit more on the hips, but it could obviously work for 6 ft dads too.  I also love that the hip and waist belt are not too thick so I didn't get sweaty AND the shoulder straps (although padded) were thin enough that I could wear a backpack and the carrier at the same time.

Baby Comfort - I was able to adjust the pack to Lucien's length so he fit well.  I liked these options and can see that I'd get my moneys worth from this pack since he will grow into it and the pack will be adjustable.  He slept in the carrier through pretty much every hike.
Breathable barrier between mom and baby.
I am wearing a backpack over the carrier straps.
Breathability - This is the real genius of this pack.  There is a mesh barrier between you and your baby.  As I climbed up mountains and was dripping sweat in 90 degree humid weather, my baby stayed dry!  It prevented us both turning into sweat machines.  The mesh also helped prevent excessive sweat along the strap lines.  I LOVE this part of the pack.  If you are going summer hiking, the other options are just too hot for you and baby.

Difficulty - While this pack is not as easy to use as the Bjorn Original, it's still pretty simple - especially considering that it works for newborn to 3 years.  It took less than a minute to get Lucien in and out.

Storage - The only storage available on the pack is the cell-phone sized pocket on the waist band.  Honestly, I didn't use this at all.  I keep my phone in my pocket and carried a backpack with me that sat comfortably over the shoulder straps of the baby carrier.


Limitations:

As far as a soft hiking carrier goes, this is (in my opinion) the best choice out there.  It was
Hiking in New Hampshire with One Outdoors.
Photo by Leanne De Craene.
comfortable for me and my baby, we didn't get sweaty, it was easy to use, and I was able to wear a backpack with it.  Still, there are some limitations to this pack since it is built as a hiking specific carrier.

Mentioned earlier, this pack is a little more complicated than the original.  As a result, it takes some user knowledge and fiddling with straps.  It's not as easy to get baby in and out of.   Although this could easily be an everyday carrier, I prefer it strictly for hiking since I have the wrap for in-home use which is a little softer and great for cooler weather.

Some mothers might find it frustrating that they cannot breastfeed while wearing the carrier.  When I needed to breastfeed, I needed to remove baby and the carrier.  This was slightly cumbersome but not a deal-breaker.

It's last limitation is storage - I didn't find the cell phone pocket on the hip band particularly helpful.  I would have preferred a larger pouch in the front or larger hip belt pouch.  This turned out to not be a problem on large hikes, however, since I was able to carry a backpack.

Conclusions:

Climbing challenging trails with One Outdoors.
Photo by Leanne De Craene.
The Baby Bjorn One Outdoors Carrier turned out to be everything it promised.  It is the perfect option for parents looking to hike with their child.  With a steep price tag (retailing around $250), it's an investment.  However, for me, it is totally worth it if you are planning regular hiking with your baby.  What's more, because of its versatility, the user can use this carrier for up to 3 years of the child's life - a promise not offered by other packs.  I look forward to using my Baby Bjorn One Outdoors Baby Carrier on all my adventures this summer as well as years to come!  Keep up with my adventures with baby Lucien here at FreelanceAdventurer.com and on Facebook at @TheFreelanceAdventurer and Instagram @FreelanceAdventurer.


Happy Baby after a day of hiking!
Photo by Leanne De Craene.

You might enjoy the following posts about hiking with a baby...

- 3 Family Friendly Nights in Acadia National Park

- White Ledge Trail - Solitude and Views Near North Conway

- Mt. Kearsarge North - 360 Views in the Heart of North Conway


Sunday, July 17, 2016

3 Family Friendly Nights in Acadia National Park

Jordan Pond in Acadia National Park.  Photo by Leanne De Craene
This time our little ones joined the trip!
Photo by Leanne De Craene.
It's that time of year again...Girl's Trip!  For the ninth year in a row, my best girl-friends and I planned an adventure trip together.  Years past have included everything from far off Newfoundland and Iceland to stateside Michigan and Colorado.  Not only have the trips changed through the years, but we have as well.  While we started off this tradition as carefree 20-somethings, we now have husbands, families, careers, and mortgages.  Still, we have found a way to continue our tradition of enjoying an adventure every summer together.  This summer, we honed in on the Northeast.  I had a two month old baby, and Courtney a toddler (and pregnant with number two). Acadia National Park in Maine seemed like the perfect destination - great views, lots of hiking, and relatively "close" to home.  It was the perfect destination for our crew.  Read on to recreate this adventure...

Adventure:  3 nights, 4 days on Mt. Desert Island - Acadia, Bar Harbor, and more!

Hadley's Point Cabins
Lodging:  We wanted an affordable housing option near Bar Harbor (VERY HARD TO FIND!)  Having a baby, I wasn't ready to camp (especially since I booked before I had even had the baby).  We were lucky to find Hadley's Point Campground where we were able to book rustic cabins for $80 a night.

 The cabins included a bathroom, queen bed, twin bunk bed, porch with picnic table, and fire pit.  It was only 10 minutes north of Bar Harbor and 5 minutes from the Acadia Visitor Center.  We loved our stay there.
** Important note - book your stay early!  We booked our July stay in January and Friday and Saturday was already sold out so we stayed Sunday-Wednesday.
View of interior cabin. 
Outside the cabin porch
Trying out the new Baby Bjorn One Outdoors!
Photo by Leanne De Craene
Gear: There's a saying in Maine - "If you don't like the weather...wait 5 minutes".  This is important to keep in mind when packing.  Besides food, camp gear, linens, and beach gear, we also were glad we packed rain gear, warm weather gear, and hiking gear.  I used this trip to gear test a new hiking baby carrier on the market - Baby Bjorn's One Outdoors.  It was crucial as a hiking-mom and allowed me to hike tens of miles each day without pain.  See my gear review HERE.

I also purchased the Appalachian Mountain Club's Acadia National Park Hiking and Biking Map.  This map provided detailed trail information including carriage road and bike trails.

Itinerary: Below is the itinerary for our trip.  I like how we were able to spend time hitting some of the main highlights of the park/island as well as some more offbeat adventures.

Day 1 - Bar Harbor Afternoon


Our first day we arrived by car to a damp and cool Maine day.  We decided to spend the afternoon walking around Bar Harbor, grabbing a bite, and setting up/snuggling in our cabin.  We enjoyed such a great lunch at Side Street Cafe that we ended up going there for dinner again on our last night!  That night we made a camp dinner and enjoyed each other's company at the campground.

Cool and rainy first day in Bar Harbor.


Day 2 - The "Right" Side


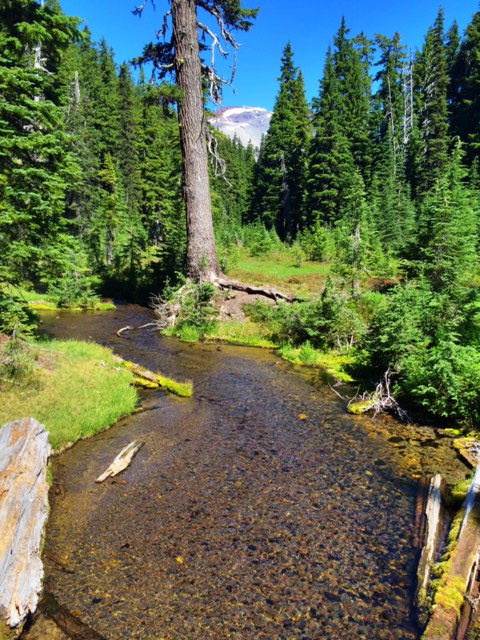
View from Gorham Mountain Summit of Beehive.
Mount Desert Island is divided into two sides - almost like two large peninsulas.  The "right" side (north-
east) is more populated and contains the popular tourist town of Bar Harbor as well as the more visited Acadia park destinations like Sand Beach, Jordan Pond, Otter Cliffs, and Cadillac Mountain.  A park loop road takes visitors to the various destinations (note- part of this loop is one-way).  Although there is a free park bus, we decided to drive ourselves around this portion - knowing there was risk of not finding parking at various spots.  Our first stop was the Visitor Center where we purchased our $25 week parking pass.

Our main stop of the day was Sand Beach.  Parking here provides access to the beach as well as popular hiking trails.  We split ways here - some spent 2 hours on the beach, some hiked the challenging Beehive Trail, but I chose to take baby Lucien up Gorham Mountain. It is an easy to moderate trail that provides amazing views of ocean, mountains, and forest at a relatively short distance.  It took me about an hour and a half to hike the out-and-back trail and return to Sand Beach.  We all met up for a little beach time before moving on.
Sand Beach
Courtney decided to stay with her toddler at the beach while Leanne and I meandered on.  We walked the Ocean Path the 1.6 miles from Sand Beach down to Thunder Hole. I enjoyed cliff and ocean views on this easy, flat path.

Ocean Path Views
Back at Sand Beach, Leanne and I hopped back in the car and drove the Ocean Drive around Otter Point.  We stopped for a beach stroll and more scenic views at Otter Cove before making way to our next big stop - Jordan Pond.

Jordan Pond is a heavily trafficked stop.  It took a while to find a parking spot here.  Besides great
Jordan Pond
hiking and views, there is the famous Jordan Pond House where guests can enjoy lunch or tea on the lawn or restaurant.  I've tried this before- it was nice enjoying gorgeous views and their famous popover rolls.  Be prepared for a long wait if you decide to dine!  We decided to pass this time and opted for another hike instead.  The 3.3 mile Jordan Pond Shore trail is an easy trail that takes you around the entire lake.  The trail is flat but involves a mile stretch of "bog bridges" which can be hard for small children and slippery when wet.  Leanne and I decided to add some challenge to our hike by climbing up the South Bubble Trail.  From the south, we climbed the rocky and steep trail to the gorgeous views of the summit.  Near the summit, the trail was very challenging.  The decent on the north side of the mountain was more moderate although involved lots of boulders with some tricky footing.  Hikers can also take a look at Bubble Rock - a precariously perched boulder on the summit of South Bubble.

**Note - Jordan Pond is the water-source for the area.  As a result - swimming and motorized vehicles are not allowed in the water.
Hike up the Bubbles was more challenging.
After our Jordan Pond hike, we returned to our car and headed north back to Hadley Point Campground for a home-made dinner at our cabin.  It was a wonderful day!

Day 3 - The "Left" Side


Hike up to Acadia Mountain.
Day 3 was designed to explore a little bit of the left (or south-west) peninsula.  After a delicious home-made breakfast in our campground, we drove south to Echo Lake.  This spot is a great place to swim, sunbathe, and relax at the freshwater beach.  After setting up Kendra and Sarah with little Cedar, Courtney, Leanne, Baby Lucien, and I headed up Acadia Mountain Trail (a short drive up the road) for a morning hike.  The trail was a moderately challenging.  Although it can be made into a loop with Valley Peak and St Sauveur Trail, we decided to just go out-and-back so we could fit in more adventures.  The peak had gorgeous ocean and mountain views and was a perfect morning hike.

After dropping Courtney back off at Echo Lake for the day, Leanne, Lucien, and I continued south on 102/102A.  We saw quaint views of Southwest Harbor and made stops to take nature walks at Wonderland and Ship Harbor.  Both trails were very easy and provided cliff, beach, and woodland views.  Ship Harbor was my favorite for the pink/red cliff views in the harbor.
Views along Ship Harbor Trail
Ship Harbor Trail
Bass Harbor Light
Our next stop was at Bass Harbor Headlight.  This picturesque light sits at the southern most point of Mt. Desert Island.  A short walk down some steep stairs and you can get the post-card shot of the lighthouse sitting above the seashore cliff.

After the lighthouse, we continued our scenic driving tour up 102.  We returned to Bar Harbor for a delicious dinner at Side Street Cafe followed by ice cream at Mt. Desert Island Ice Cream.  After watching the sunset in the harbor, we returned to our cozy cabins.


Sunset in Bar Harbor

Day 4 - Sunrise on Cadillac and Delicious Breakfast


On our last day, Leanne and Sarah got up at 4 am to drive the auto road up to the summit of Cadillac Mountain.  This popular activity gives viewers an opportunity to be the first in the US to see the sunrise for the day.  I'd experienced the sunrise view on past trips so I decided to sleep in on this occasion.  After a little more shut eye, Leanne and I packed up and went to Bar Harbor's 2 cats for breakfast.  After a yummy breakfast, we spent time gift shopping in town and lounging in the grassy knoll in the town center before leaving the island.
Sunrise on Cadillac Mountain. Photo by Leanne De Craene.

Final Thoughts 

Acadia was the perfect place to spend sometime with kids and girlfriends.  We enjoyed gorgeous views, endless choices in hiking, and a wonderful seaside town.  It would be easy to spend more time there finding more hikes and getting adventurous on the carriage trails.  It was great to realize that even with our busy lives, we could still escape for a wonderful friend and adventure filled vacation.
Me and my girls (and boy)


You might also enjoy the following adventures:

Four Family Friendly Days in Olympic National Park

Waterfalls and Swimming Holes - Vermont Adventures

Girls Trip 2014 - L.A. to Colorado