Showing posts with label 4000 footer. Show all posts

Sunday, July 2, 2023

A Trip to Greenleaf Hut with Appalachian Mountain Club

I was lucky enough to take part in a guided hut trip with the Appalachian Mountain Club!  This is not my first trip to the high huts.  I worked for AMC from 2007-2010 and regularly took groups to the area.  This felt like a coming home as well as a reawakening to the many possibilities of the mountains and how much the AMC contributes to my hiking happiness.  
Text:  A trip to Greenleaf Hut with Appalachian Mountain Club by Freelance Adventurer
Check out the three day guided trip to Greenleaf Hut
 with Appalachian Mountain Club (AMC) in the White Mountains.


If you'd like to do a guided trip, check out both the free (day hikes) and pay (overnight) trips offered by the club here.

Don't need a guide?  Book your own stay at Greenleaf Hut or another AMC facility.

Before you book, become a member.  Members get 20% off their stay as well as other discounts and benefits!

Read on to learn how to have a memorable 
adventure with AMC at Greenleaf Hut in 
the White Mountains of New Hampshire.

Here's how to recreate this adventure...

Day 1:  The AMC Highland Center at Crawford Notch.

I arrived at AMC Highland Center in the heart of the White Mountains of New Hampshire around 5:30 pm.  Just in time for happy hour in the living room!  It was a rainy night, but the field of lupine in front of the lodge made for a welcome site.  I was given a name tag, checked into my private room/private bath, and mingled and met the rest of the group at happy hour.  

Highland Center at Crawford Notch
Enjoyed my first night at the Highland Center in Crawford Notch.

At 6 pm, we moved to the dining room where we enjoyed a delicious lodge dinner - served buffet style.  After dinner, we convened in one of the classrooms.  Our guides facilitated introductions, went over the hiking plan, and what we needed to pack.  Next, we were shown to the basement LL Bean gear room.  This is available to guests and participants.  It has everything from high quality hiking boots, fleeces, sleeping bags, backpacks, and more.  Many of the participants borrowed packs, boots, and rain gear.  Around 8:30 pm, we departed to our personal rooms to pack, shower, and rest up for the next day's hike.

All your gear needs will be met in the LL Bean room
available free for guests at AMC facilities.

Day 2: Hiking to Greenleaf Hut

I woke up and packed, then headed downstairs for a hearty breakfast from the lodge cafeteria. We got a weather update and set out.  Our trailhead was a short drive away.  We were offered to either be transported by van or travel alone.  I took my car to cut down on the next day's drive.

We arrived at the Old Bridle Path trailhead in Franconia Notch around 8 am.  Our lead naturalist, Nancy, gave a rundown on some of the flora and fauna we might see on the trail and we took off at a moderate pace. 

Trailhead - 2.9 miles to our destination.

 A ways up the trail, we reached a section that was being worked on by the Appalachian Mountain Club's professional trail crew.  I was amazed to see their beautiful work and learned about the "Restoring the Ridge" project - a collaboration between the federal government and Appalachian Mountain club - to preserve this iconic loop hike for generations to come.  We also learned that our AMC membership helps this project!  

two female trail crew members build steps by hand on the Old Bridle path
AMC professional trail crew makes steps
that will last generations and handle thousands
of yearly visitors and harsh weather.

This project combines federal dollars with
AMC funds from your membership.

Soon, we popped out onto a ledge.  While the Franconia ridge above was still in the clouds, we were able to see views of the valley below.  While taking a restful snack break, our naturalist brought our attention to various bird calls.

hiking group takes break on ledge and view valley below
We take a break along Old Bridle Path.

The trail got steeper as we approached the hut.  When we got to Greenleaf hut, it was hugged by a cloud.  Now, around 1 pm, we were ready for our trail lunch (given/packed by the Highland Center kitchen).  After choosing a bunk in the hut, we sat on the porch and enjoyed our lunch.  

two girls climb up to the top (3rd bed) bunk in AMC hut
Bunks come with a pillow and three wool blankets. 
Bring sheets or sleeping sack/bag.

We still had plenty of time until dinner, so even though the visibility wasn't great, we decided to summit Mt Lafayette.  Hoping the clouds would clear by the time we got up there, we continued up into the alpine zone.  Nancy pointed out new plants off the trail.  In about an hour, we reached the ridgeline.  Unfortunately, there was no view due to clouds and mist, but that's ok.  We descended off Lafayette, back to the hut.  

We were treated to an informative talk about the climate science done by AMC scientists as well as their citizen science programs.  We also learned about the hut systems that makes it sustainable in the peaks.

approaching greenleaf hut in fog
Greenleaf Hut is run by Appalachian Mountain Club. 
In summer, it is a full service hut with bathrooms, meals, and beds.  Reserve online.

Dinner was multiple courses - served family style at long tables. You won't go hungry!  The food was both delicious and plentiful.  After dinner, guests read from the library, played games, and chatted before quiet hours at 9:30 pm.  Around sunset, the clouds cleared and we were treated to views of the magnificent Franconia Ridge!  It was a welcome site for guests and staff!

Day 3: Summit views and hiking down

The hut croo (yes, that's how they spell it), woke us up to some soft singing at 6:30 am.  We got up, dressed, and packed and then had a delicious breakfast in the dining room at 7 am.  After breakfast, the group discussed our goals.  Half of the group was ready to take Bridle Path down to return home before noon.  Some of us (me included), wanted to summit Mt Lafayette once more to get a summit view.  With multiple leaders, we were able to split the group.

morning light on tables laid out for breakfast at AMC Greenleaf hut
Morning light streams in at Greenleaf hut -
laid out for breakfast.

As our group moved up the mountain, the clouds came rolling back in.  Fortunately for us, however, we were able to get a ridge view (with clouds) from the top.  

Woman (The freelance adventurer) stands center and behind her franconia ridge on Mt Lafayette
Arguably Mt Lafayette is one of the best views in the White Mountains.

After a leisurely summit break, our small group worked our way back to the hut.  After a bathroom break, we chose to take a different trail down - the Greenleaf Trail.  Some highlights of this trail included mossy "fairy forest" and Eagle cliff.  

Our guides brought us back to our cars two exits down the road.  It was a sunny, warm summer day and couldn't have been a better end to the trip.

Cliff face and ferns along it.
Eagle Cliff along the Greenleaf Trail

Want to try this experience?

Go to AMC activities, and check out the backpacking options.

or

Hike yourself without a guide!  Book your hut stay!

and

Become a member to support the trail work, science, and recreation by Appalachian Mountain Club.

Want to see more video and photos from this trip? Check out more on my instagram account the @freelanceadventurer

Text: hut trip with AMC - 3 day guided trip with Appalachian Mountain Club
Highly recommend going on a guided trip with Appalachian Mountain Club.


You might also like these adventures:

Carter Notch Hut in Winter
Lonesome Lake - Perfect Family Hike
24 Hour Affordable Getaway in the White Mountains


Monday, October 17, 2022

Owl's Head 1 Night Backpack - The Most Remote 4000 footer


After our successful summer backpack to peak bag Mt. Isolation, Kelsey and I decided why not to use the same strategy to conquer the most remote 4,000 footer peak on New Hampshire's 48 list - Owl's Head.  

Owl's Head is located in the heart of the Pemigewasset  Wilderness.  The only way to access the summit is by first hiking into the center of this wilderness area, and then climbing up a steep slide.  As a day hike on maintained trails, this hike is 9.1 miles one way.  I know my knees...and an 18.2 mile day is not a great option for me. Our plan was to hike in, summit, then spend the night.  Making two days of about 9 miles each.  

The day before our backpack, a torrential storm doused the region with +6 in of rain and caused all the waterways to swell.  This wasn't good for us.  We had many water crossings.  So, we regrouped and decided to take the well known "Black Pond Bushwhack" which would eliminate all but two of the water crossings.  This plan proved to be extremely successful!  We had a really enjoyable time in the Pemi for a night and we were spoiled with perfect fall weather, foliage, and no bugs.  

Fall backpacking means mild weather and no bugs!

Here's how to recreate this adventure:

Adventure

One Night Backpack to Owl's Head Peak in the White Mountains, New Hampshire

Getting There

This hike is accessible from one of the most popular trailheads in the Whites - The Lincoln Woods Trailhead.  Located just 4 miles down the Kancamagus Highway from the town of Lincoln, this parking area is easily accessible.  However, it fills quickly.  Knowing it was going to be a nice fall weekend, we arrived at 8 am.  There were still a few spots left in the lot.  Parking costs $5 a day here.  Bring cash or a check.  We used our national park pass so didn't have to pay the iron ranger.

Trail

From Lincoln Woods Trailhead, we took the Lincoln Woods Trail to the Black Pond Trail.  At Black Pond, we continued onto the Black Pond Bushwhack (not marked).  This bushwhack took us to Lincoln Brook trail and cut out many river crossings and shortened the hike by a mile! Next, we took Lincoln Brook and set up camp at our first large river crossing (see below).  We did both river crossings and took Owl's Head path up the slide to the summit.  Coming off the summit, we opted to take the Brutus Bushwhack back to Lincoln Brook and return to camp.  The following day we returned to parking the same way we arrived.  

Our Route

Here is a more detailed itinerary:

Start - 8:30 am - We sign into the ranger log, cross the Lincoln Woods pedestrian bridge and head north on Lincoln Woods trail.  The river was raging and the fall foliage peak. It was a long, flat walk but really really beautiful. There weren't many other hikers at this time of day. We 

Black Pond - We turn off the Lincoln Woods trail and hike the 0.8 mile trail to Black Pond.  This trail had a slight uphill grade but was still pretty easy.  It went through hardwoods forest and emerged with a beautiful view of a small mirrored pond and mountains behind it.  

Black Pond Bushwhack -  Although the trail officially ends with the pond on the right.  We continued straight onto the bushwhack.  Knowing we wouldn't have cell service, we had downloaded the Gaia and AllTrails maps.  Even without cell service, we were able to follow our trek on the digital maps.  While the bushwhack is fairly obvious, the recent dropped leaves made it somewhat challenging to follow the trail.  Both these maps systems are only available for subscription holders.

Lincoln Brook Trail  - 10:30 am - The bushwhack popped us out at the Lincoln Brook trail. We turned left and followed the trail as it parallels Lincoln brook.  The trail is fairly easy - a low inclining grade with few challenges except for some mud and puddles.  It is not blazed (which really surprised me).

River Crossing and Camp - 12:00 pm - At noon, we reached the first crossing of Lincoln Brook.  Kelsey noticed the cliff above us has a plateau and scrambles up to find a nice dispersed/impacted camp site.  We set up our tent, have a lunch break and pack small bags for the rest of our journey.  After securing camp, we cross this section and soon after another.  Kelsey stayed dry with waterproof boots and gaiters.  I brought a pair of sneakers to get wet wading the crossings.  

Owl's Head Path/Slide - After the crossings, we found the two cairns that signal the Owl's Head Path.  The climb is steep and involves quite a bit of lose rock.  As we climbed the slide, the views behind us got better and better.  It was a clear day and we had fun identifying the various peaks of Franconia Ridge.  We paused for a long break and enjoyed the view. 

Summit - 2:40 pm - After the slide, the hike continues through woods, past a false summit and eventually ends at lack luster small cairn signaling the true summit.  Prior to this, however, you get one more small view of the Bonds across the Pemi.  We summited at 2:40 pm, took a selfie and then turned around.  

Brutus Bushwhack - At 3:10, we reached the offshoot to the Brutus Bushwhack.  Again, our Gaia maps were very helpful in finding this.  The bushwhack is located near the end of the slide at a large moss covered boulder.  The day we did it,there was also a small cairn at it's base and on its top.  The bushwhack is steep but on soft ground through the woods.  It was a little tricky to follow at times, but eventually we got back to Lincoln Brook path - very close to the second water crossing.  

Camp - 4:10 pm - We crossed both rivers again and returned to our camp just after 4 pm.  We made an early dinner, filtered water from the brook, changed into warm clothes, played cards and were in bed by 7 pm.  We secured food using an ursack.  In the morning, we got up around 7 am, made breakfast, packed up and took off at 8:20 am.

Brutus Bushwhack - 9:25 am - About an hour later, we reached the Brutus Bushwhack.  We retraced our steps back to the pond, then Lincoln Woods Trail.  We got back to the parking lot at 11:30 am.  Our hike was complete!

Lincon Woods Trail

Rules and Regulations

Disperse Camping

You do not need a permit to hike and camp in this region. Disperse camping is camping outside a designated campground or tent site.  It is not allowed everywhere so make sure you know the rules and regulations of the area you are planning to camp.  The section of trail we camped (Lincoln Brook Trail) is in the Pemigewasset Wilderness that is part of the White Mountain National Forest.  Rules for this area are:

  • Limit group size to 10 people
  • Camp at designated sites OR at least 200 feet away from trail, water source, or campground.
  • No mechanized equipment is allowed
You can learn more about these rules on the US Forest Service Website.

In addition, it's important to practice Leave No Trace including the proper disposal of human waste and removal of all toilet paper and trash.

Water was easily accessible from the river, but it is important to treat water since it can harbor pathogens and bacteria - even in the wilderness.  I used the Sawyer Squeeze as my main form of water treatment.  

Lastly, I recommend purchasing and carrying a New Hampshire Hike Safe Card.  For $25 a year, you are covered financially if you need to be rescued.
Our Campsite


Gear and Apparel

For a fall one night backpack in the White Mountains I brought the following:

For questions about gear, DM on my instagram and I'm happy to provide guidance!
Kelsey and I at the summit of Owl's Head

Final Recommendations/Things to Consider

  • This was a great one night backpack for someone who wants a quick escape.  Although most of the hike is easy, the scramble up Owl's Head Path is challenging and would be quite dangerous in foul weather.    Be prepared and turn around if you are above your ability level.
  • Always tell someone your plan.  For safety, carry the 10 essentials.  You will not have cell service any of this hike.
  • I suggest downloading a set of maps from Gaia or AllTrails prior to your hike.  Bring a cell phone battery pack to make sure you don't lose access to those maps.  In addition, carry a traditional map and compass.
  • In order to reduce weight while summiting, you can set up your camp and then ascend with a "slack pack".  
  • Be aware of wildlife. This is quite a remote area of the Whites.
Beautiful Views on the Slide


You might also like these adventures:

One night on Mt Liberty
Carter Notch One Nighter in Winter
Mt Garfield One Night Backpack
- One Night Backpack up Mt Isolation

Morning light on the Lincoln Brook Trail


Monday, July 18, 2022

White Mountains One Night Backpack: Mount Isolation


Want to check off another 4,000 footer while spending the night in the Presidentials?  So did I!  Tackling Mt. Isolation as an over-nighter turned out to be the perfect one night backpack in the White Mountains.  

Here's how to recreate this adventure...

Adventure

One night backpacking trip on Mt. Isolation in the White Mountains

Getting there

This hike starts from the Rocky Branch Trailhead on Route 16 in Pinkham Notch, New Hampshire.  To get there, take Route 16/White Mountain Highway north through North Conway.  Where 302 and 16 split, take a right and continue on NH-16 into Pinkham Notch.  After about 8 miles, turn left onto Popple Mount Trail.  The parking lot is a good size and is free to park.  It is possible that it will fill on busy summer weekends so plan accordingly.  

Many river crossings on Isolation Trail

Trail

The total mileage for this backpack is 13.3 miles and 3,503 ft of elevation gain.  It is an out and back hike that includes three different trails to summit. Overall, this hike is moderate difficulty. Terrain is not technical.  Although there are many river crossings, in July of 2022 when I did it, water was generally low and it was easy to rock hop across. It is possible to do a similar hike by making it an *almost* loop.  See below under recommendations for this alternate.

Part 1 - Rocky Branch Trail

The first part of this backpack is a stead climb up the Rocky Branch Trail.  The trail is well marked (yellow blazes) and climbs through deciduous hardwood forest.  We saw moose scat and even saw a moose!  I startled it by accident about 20 yards away and never got another look. There is no real water access along this portion of the trail.  At 3.7 miles from the trailhead, Rocky Branch reaches a junction with Isolation Trail.

Part 2 - Isolation Trail

Rocky Branch trail crosses the Rocky Branch River at 3.7 miles.  Immediately after, there is a well marked trail junction sign.  To continue to Mt. Isolation, turn right.  Over the next 2.6 miles of trail, hikers parallel the Rocky Branch River and cross it many times. The trail is well marked and easy to follow will only slight elevation gain.  It is this section of trail that is best for dispersed camping. I noticed many impacted dispersed sites along this section of the trail as well as trodden spur trails that led to other sites.  One of the largest was just after the second river crossing on the opposite side of the river.  Further on, there was an official sign indicating a spot to disperse camp on the west side of the river.  My friend Kelsey and I scoped multiple sites along the way, planning on picking one that would best fit our needs on our descent. 

Part 3 - Davis Path

After 2.6 miles on the Isolation Trail (6.3 total), the trail reaches an intersection with the Davis Path.  From here, take a left and climb the moderate climb 0.9 miles to the summit of Mt. Isolation. The spur trail to the summit is on the right and not marked so don't miss it!  Climb the sport spur and enjoy expansive views of the Presidentials including Mt. Washington.  

Water break on Isolation Trail


Part 4 - Descend and Find Camp

As we descended, we discussed our favorite places we had scoped to disperse camp.  We ended up deciding on a small plateau about 300 feet off the final river crossing of the Rocky Branch river on the Isolation Trail.  This spot was chosen due to it's proximity to a deep "swimming hole" next to a massive boulder.  My hiking companion, Kelsey, loves to swim when hiking and she was excited to chill out here.  We found an already impacted site and evidence of an old fire ring off trail and a flat spot just big enough for our tent.  We set up camp and did our cooking (using a backcountry stove) down by the river to keep food smells away from where we slept.  At night, we put all food, smelly toiletries like toothpaste, and trash in my Ursack Bear-proof bag and hung it down by the river away from our tent.  In the morning, we had breakfast, packed up and hiked out.

Dispersed campsite on Isolation Trail


Rules and Regulations

Disperse Camping

You do not need a permit to hike and camp in this region. Disperse camping is camping outside a designated campground or tentsite.  It is not allowed everywhere so make sure you know the rules and regulations of the area you are planning to camp.  The section of trail we camped (Isolation Trail) is in the Dry River Wilderness that is part of the White Mountain National Forest.  Rules for this area are:

  • Limit group size to 10 people
  • Camp at designated sites OR at least 200 feet away from trail, water source, or campground.
  • No mechanized equipment is allowed
You can learn more about these rules on the US Forest Service Website.

In addition, it's important to practice Leave No Trace including the proper disposal of human waste and removal of all toilet paper and trash.

Water was easily accessible from the river, but it is important to treat water since it can harbor pathogens and bacteria - even in the wilderness.  I used the Sawyer Squeeze as my main form of water treatment.  

Lastly, I recommend purchasing and carrying a New Hampshire Hike Safe Card.  For $25 a year, you are covered financially if you need to be rescued.
Swimming hole near camp * It was very cold*

Gear and Apparel

For a summer one night backpack in the White Mountains I brought the following:

For questions about gear, DM on my instagram and I'm happy to provide guidance!

Summit of Mt. Isolation

Final Recommendations/Things to Consider

  • This was a great one night backpack for someone who wants a quick escape.  Although I list this as a moderate climb, it is still a 4,000 footer in the White Mountains and challenging compared to flatland hiking.  Be prepared and turn around if you are above your ability level.
  • Always tell someone your plan.  For safety, carry the 10 essentials.  You will not have cell service for most of this hike although I did have 2 bars on the summit of Mt. Isolation.
  • To make this a sort of loop, hikers can ascend via the Glen Boulder Trail and descend on Rocky Branch.  This would mean either having two cars or having a couple mile road walk up NH-16 back to your car.
  • In order to reduce weight while summiting, you can set up your camp and then ascend with a "slack pack".  We originally planned to do this but then changed our minds in case we found a better campsite on the Davis Path.  Now we know that all the good camp spots are along the Isolation Trail near the brook.
  • Be aware of wildlife.  We startled a moose!


You might also like these adventures:

- One night on Mt Liberty
- Carter Notch One Nighter in Winter
- Mt Garfield One Night Backpack

Thursday, November 21, 2019

Mount Washington in Fall

We weren't planning on summiting that day.  My parents had agreed to watch the kids while we took an "adult hike".  I let my husband choose - knowing he would pick something around Mt. Washington - his favorite peak.  We started from Pinkham Notch Joe Dodge in the clouds and fog.  The visibility in Tuckerman Ravine was awful, but wanting to get a little more exercise we decided to climb the Boot Spur Link up to Boot Spur Trial.  As we continued along the ridge, I heard Matt call "LOOK!".  The clouds parted and we were soon looking at Mt. Washington with a backdrop of blue.  Below us the under-story of clouds provided a blanket over the valley.  It was then we decided to go for the summit.
Boot Spur to Tuckerman Ravine Trail

Here's how to recreate this adventure...


Adventure:  Mt.Washington summit loop via Tuckermas, Boot Spur, Davis, Tuckermans, Nelson Craig, Alpine Garden, and Lion's Head.

Getting there: Our adventure began at AMC Pinkham Notch Visitor Center.  To get there, take Route 16 north out of North Conway.  At the 302/16 intersection, turn right to stay on Route 16.  About 11 miles from the intersection you will reach the visitor center on the left.  There is a large parking lot, AMC visitor center/dining hall and Joe Dodge Lodge.  The Tuckerman Ravine trailhead is located directly behind the main visitor center building with a well marked sign and is the starting point for many of the other trails that come off it.
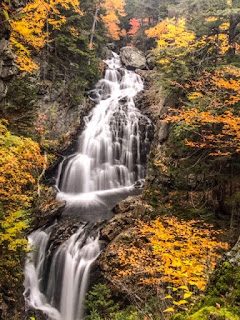
Crystal Cascade on the Tuckerman Ravine Trail near Pinkham Notch Visitor Center.

Trail: This hike involved many trails.  There are numerous stories of people who have gotten lost in this region.  It is important to use a AMC trail map (available for purchase in the visitor center) and familiarize yourself with it before departure.  Below is the way we took...

Part 1: Visitor Center to Hermit Lake Shelter
We started by taking the Tuckerman Ravine trail from Pinkham Notch.  This trail is wide, a steady uphill, and uneven terrain.  My mom once asked "Is this a dried up river bed?" and that statement perfectly describes the trail.  Along the way, enjoy views of Crystal Cascade - a photogenic waterfall.  This section is 2.4 miles one way and ends at a shelter deep in Tuckerman's Ravine.

Part 2:  Hermit Lake to Boot Spur
From Hermit Lake Shelter, we took the Boot Spur Link...up.  I've taken this trail with Matt a few years ago, and we took it down.  It's one of the steepest trails I've ever done in the White Mountains and not for the weak knees.  When you get to the ridge, the link meets up with Boot Spur Trail.  Continue up the Boot Spur trail until you at the Davis Path intersection. This section is 1.3 miles.

Part 3: Davis Path to Tuckerman Junction
From Boot Spur, take the Davis Path toward the summit.  This exposed rocky trail is marked with cairns.  Turn right at the Lawn Cutoff and continue towards the summit.  Clear days provide stunning views of Mt. Washington's summit and surround ridges.  The Lawn Cutoff ends at Tuckerman Junction where five points of trail meet. This section is 1.0 mile.

Part 4: From Tuckerman Junction, take Tuckerman Ravine Trail the last half mile to the summit.  This steep climb is covered in boulders and extremely exposed and steep.  Emerging at this peak can be somewhat anticlimactic since the Auto Road and Cog railway brings non-hiking tourists to the summit it can be crowded and busy.  This section is 1.0 mile.

View of the Mount Washington summit from the top of Boot Spur


After a warm beverage and bathroom break in the summit's visitor center, we headed back down a different way.

Part 5: Nelson Craig Trail to Alpine Garden
From the summit, we took the Nelson Craig Trail which parallel's the Auto Road.  At the Huntington Ravine Trail, we turned right for a short distance until it met with the Alpine Garden Trail. Huntington Ravine Trail is dangerous and never recommended for decent. We decided to take the Alpine Garden trail which cuts back along the ravine and reconnects with Lion's Head trail and Tuckerman Ravine Trail. This section is 1.9 mile.

Part 6: Lion Head Trail to Tuckerman Ravine Trail
After 0.9 miles of the Alpine Garden Trail, it reaches Lion's Head Trail.  From here we took the steep and sometimes technical Lion Head Trail down the mountain.  At 1.1 miles, it reconnects with Tuckerman Ravine trail just below Hermit Lake.

Part 7: Tuckerman Ravine Trail to Pinkham Notch Visitor Center
We finished the hike by retracing steps down the river-bed-like Tuckerman trail back to the Pinkham Notch Visitor Center.  This is about 2 miles. Done!

Image result for mount washington trails"
Photo of Map. All hikers should have a purchased AMC map.
Difficulty: Strenuous and Challenging

Distance: 10.7 miles using this path.

Fall Foliage at its best on the Tuckerman Ravine Trail

Recommendations:

- Each year there are tragic stories of injury and even death on Mt. Washington. This peak boasts the most extreme weather in the world and hikers often underestimate the challenge because its relatively low elevation.  Plan ahead and be prepared.  Matt and I each packed multiple layers including base layers, rain layers, and multiple poly blend warm layers - plus warm hats, gloves, and scarves.  We carried 2 L of water a person, food, and a large first aid kit.  We also carry the AMC map. Be prepared to scrap your plans based on weather.

- Parking is available at Pinkham Notch visitor center but is very popular and crowded in summer.  Plan ahead by getting there early.

Although Mount Washington wouldn't have been my choice of hike that day, I cannot imagine a better day to summit.  We were lucky with weather, visibility, and trail conditions.  Less than 48 hours later - the entire peak was covered in ice and snow.  Be safe out there!
Views from Alpine Garden Trail


You might also enjoy...

- Mt Osceola via Tripoli Road

- Mt Carrigan Loop

- One Night on Mt Liberty

Sunday, August 18, 2019

Summer 4000 footer - Mount Osceola via Trail on Tripoli Road

Back in May of 2015, I headed up to Tripoli Road to solo hike Mount Osceola.  Unfortunately, I discovered that in early May, the Tripoli Road is still "closed for winter" and I couldn't hike it.  I ended up taking the nearby multi-use Livermore Trail for a day hike and blogged about it.  It's now over four years later, but I decided to try again.  This time with my friend Kaley and her two dogs.

When looking for a hike to tackle today, I wanted something with a good view that wouldn't break us - neither had been doing strenuous hiking in the last couple months.  My choice was perfect! This moderate 4,315 footer is a steady out and back climb without any major slab or technical difficulty.  If you can just keep climbing up for 3.2 miles up and then back, you're in for the reward of spectacular views of the Sandwich Range.

View from Osceola summit.  Photo taken by my friend Kaley.

Here's how to recreate this adventure...

Adventure:  Mount Osceola via Mount Osceola Trail on Tripoli Road

Getting there:  We followed cell navigation to the trail head.  It took us a slightly different way than some websites but made good time and wasn't hard to find.  From I-93, take exit 28 for NH-49 toward NH 175/Campton/Waterville Valley.  Then turn right onto NH-49 E/State Hwy 49 E. In 10 miles, take a left onto Tripoli Rd.

Tripoli Road is only open in summer and is in moderately-poor condition for a paved road.  We dodged pot holes while slowly driving the couple miles to the Mount Osceola Trailhead.  There is a parking area but even by 9:00 am on a Sunday, it was full and we parked along the road with other vehicles.  There are outhouses at the trailhead as well as a parking fee (currently $5 a vehicle - bring exact change or check).
Roots and Birches

Trail: This is a moderate climb - especially for a White Mountain 4,000 footer.  The trail starts with a gradual climb and continues going up for the entire trek.  The ground cover changes back and forth from rocks to roots and packed dirt.  We were able to keep a steady pace without involving climbing or grabbing trees for support.  I really fell in love with the mossy rocks lining the trail in the hardwood forest.  As we gained elevation, we were able to see glimpses of the view through the evergreen branches.  The last mile of the trail was the most challenging - with slightly steeper grade and short slabby sections which were wet from the previous nights storm.  Still, nothing too intimidating.

Love these moss covered rocks
The view from the summit was beautiful!  The lookout is an open slap that gives you about a 180 degree view of the mountains south of the Kancamagus Highway called the Sandwich Range.  It was a moderately trafficked trail and there were probably 4-5 other groups up there enjoying the sunshine and view.  After a sun and snack break, we headed back down to the car the same way we had come up.  Some hikers decided to continue and bag "East Osceola" - another 4,000 nearby, but since it doesn't have a view, we weren't interested.

Difficulty: Moderate

Distance: 3.2 miles one way, 6.4 out and back

Recommendations:

- This would be a great hike for someone wanting to try their first 4,000 footer.  Although it was a steady climb with rocky trail, there were no technical skills needed.

- Remember your $5 for parking envelope.

- Don't make my mistake and assume the Tripoli Road is open in May. Summer only!

- This was a moderately trafficked trail and very dog friendly.  About a forth of hikers had dogs off leash.  Few asked if we wanted them to leash them.

Although I actually summited this mountain back in my guiding days, I had never taken the approach from Tripoli Road.  As a mom of a one and three year old, I don't get the opportunity often to take a full day to drive to the White Mountains and do a day hike.  I have to choose carefully!  This was the perfect hike for a summer day.

Please leave comments and questions below.  Follow us on Facebook at The Freelance Adventurer. or on Instagram @freelanceadventurer.


Steady uphill climb gave these rewards
Kaley's dogs - Dexter and Cooper

You might also enjoy the following:

- Mt Carrigain Loop - 4000 Footer and More

- Mount Pierce in Late Spring

- Advice For Hiking in the White Mountains

Saturday, September 26, 2015

Mt. Carrigain Loop - 4000 footer and more

View of Mt. Carrigain summit as you approach from Signal Ridge Trail

A perfect fall day was improved by a White Mountain hike with two of my favorite girls.  We started the adventure with a plan to summit the 4700 ft Mt. Carrigain as an out-and-back hike.  Once on the summit, the ideal weather made us long for more, so we continued down Desolation Trail to Carrigain Notch Trail - making a sweet 13.5 mile loop.  It was a great way to enjoy the mountains, views, and friends.

Adventure: Mt. Carrigain Loop

Trailhead across from parking lot.
Getting There: From southern New Hampshire, we took Highway 16 north to North Conway.  Here we took Rt 302 North/East towards Crawford Notch State Park.  Just after the town of Bartlett, take a left on Sawyer River Road (closed in winter).  The road is across from Fourth Iron Tentsite and if you enter Crawford Notch State Park, you've gone too far.  Drive up Sawyer River Rd about 2 miles.  A signed parking lot is on the left and the trail is on the right.  There are no bathrooms and no cell service at the trail head.


Trail:  The adventure starts with Signal Ridge Trail.  The trail parallels a brook and is relatively flat for the first couple miles.  It winds through beautiful hardwood forest.  At 1.7 miles, you reach the junction for Carrigain Notch Trail.  Stay left to summit.  As we continued, the trail rapidly changed to a steady uphill climb.  The hiking isn't difficult (no slab or boulders), but the constant up can be very tiring and strenuous.  From the junction, continue 3.3 miles until you reach the summit.  Hikers can climb the fire tower for a 360 degree of the Pemigewasset Wilderness.

Summit of Mt. Carrigain
After enjoying our lunch in the sun, we decided to continue our adventure by making our hike into a loop (adds 3.5 miles to the previously planned out-and-back).   Desolation Trail was a steep grade - narrow, mossy rocks made for a slow and cautious decent.  At 1.9 miles Desolation reaches Carrigain Notch Trail.

Continue along Carrigain Notch Trail over a relatively flat path.  We crossed streams and were surrounded by more hardwood forest.  There were few other hikers on the remote trail and we enjoyed the solitude and easy hiking.  After 4.1 miles on Carrigain Notch Trail, you meet back with Signal Ridge Trail.  Take the 1.7 flat trail back to the parking lot.   It was a wonderful long loop and I highly recommend it!


Difficulty: Moderate - Difficult.  The trails themselves aren't too bad (although Desolation had it's difficult moments), but the long trail and sustained hiking makes this day hike for experienced hikers only.

Descent on Desolation Trail
Distance:  13.5 miles for complete loop.  10 miles for an out-and-back to Mt. Carrigain.

Recommendations:  

- Even though half of this loop is on flat ground, two of us ran out of water on the last couple miles.  Bring over 2 liters when traveling over ten miles.

- There was no cell service at the parking lot or along the hike.  Make sure loved ones know where you have gone and when to expect you back.

- There are no water or bathroom facilities at the trailhead nor along the hike.  Plan ahead and be prepared.

- Sawyer River Road is closed in winter.  Be aware of road conditions if planning your hike for late fall - early spring.

Summit the Dog on Carrigain Notch Trail


I LOVED this hike with my friends Courtney and Ingrid.  I'm so grateful to have friends who share my love of nature and the great outdoors.  Consider this for your next big day hike!


Please leave comments and questions below.  Don't forget to visit us on Facebook at https://www.facebook.com/TheFreelanceAdventurer

Best of Friends on the Mt. Carrigain Fire Tower!

You might also enjoy...

Mt. Moosilauke - Moderate Hike for a Major View

Butt Burner in the White Mountains - Mt. Flume to Mt. Liberty

Mt. Pierce in Late Spring