Saturday, September 26, 2015

Mt. Carrigain Loop - 4000 footer and more

View of Mt. Carrigain summit as you approach from Signal Ridge Trail

A perfect fall day was improved by a White Mountain hike with two of my favorite girls.  We started the adventure with a plan to summit the 4700 ft Mt. Carrigain as an out-and-back hike.  Once on the summit, the ideal weather made us long for more, so we continued down Desolation Trail to Carrigain Notch Trail - making a sweet 13.5 mile loop.  It was a great way to enjoy the mountains, views, and friends.

Adventure: Mt. Carrigain Loop

Trailhead across from parking lot.
Getting There: From southern New Hampshire, we took Highway 16 north to North Conway.  Here we took Rt 302 North/East towards Crawford Notch State Park.  Just after the town of Bartlett, take a left on Sawyer River Road (closed in winter).  The road is across from Fourth Iron Tentsite and if you enter Crawford Notch State Park, you've gone too far.  Drive up Sawyer River Rd about 2 miles.  A signed parking lot is on the left and the trail is on the right.  There are no bathrooms and no cell service at the trail head.


Trail:  The adventure starts with Signal Ridge Trail.  The trail parallels a brook and is relatively flat for the first couple miles.  It winds through beautiful hardwood forest.  At 1.7 miles, you reach the junction for Carrigain Notch Trail.  Stay left to summit.  As we continued, the trail rapidly changed to a steady uphill climb.  The hiking isn't difficult (no slab or boulders), but the constant up can be very tiring and strenuous.  From the junction, continue 3.3 miles until you reach the summit.  Hikers can climb the fire tower for a 360 degree of the Pemigewasset Wilderness.

Summit of Mt. Carrigain
After enjoying our lunch in the sun, we decided to continue our adventure by making our hike into a loop (adds 3.5 miles to the previously planned out-and-back).   Desolation Trail was a steep grade - narrow, mossy rocks made for a slow and cautious decent.  At 1.9 miles Desolation reaches Carrigain Notch Trail.

Continue along Carrigain Notch Trail over a relatively flat path.  We crossed streams and were surrounded by more hardwood forest.  There were few other hikers on the remote trail and we enjoyed the solitude and easy hiking.  After 4.1 miles on Carrigain Notch Trail, you meet back with Signal Ridge Trail.  Take the 1.7 flat trail back to the parking lot.   It was a wonderful long loop and I highly recommend it!


Difficulty: Moderate - Difficult.  The trails themselves aren't too bad (although Desolation had it's difficult moments), but the long trail and sustained hiking makes this day hike for experienced hikers only.

Descent on Desolation Trail
Distance:  13.5 miles for complete loop.  10 miles for an out-and-back to Mt. Carrigain.

Recommendations:  

- Even though half of this loop is on flat ground, two of us ran out of water on the last couple miles.  Bring over 2 liters when traveling over ten miles.

- There was no cell service at the parking lot or along the hike.  Make sure loved ones know where you have gone and when to expect you back.

- There are no water or bathroom facilities at the trailhead nor along the hike.  Plan ahead and be prepared.

- Sawyer River Road is closed in winter.  Be aware of road conditions if planning your hike for late fall - early spring.

Summit the Dog on Carrigain Notch Trail


I LOVED this hike with my friends Courtney and Ingrid.  I'm so grateful to have friends who share my love of nature and the great outdoors.  Consider this for your next big day hike!


Please leave comments and questions below.  Don't forget to visit us on Facebook at https://www.facebook.com/TheFreelanceAdventurer

Best of Friends on the Mt. Carrigain Fire Tower!

You might also enjoy...

Mt. Moosilauke - Moderate Hike for a Major View

Butt Burner in the White Mountains - Mt. Flume to Mt. Liberty

Mt. Pierce in Late Spring

Sunday, September 20, 2015

One Night on Mt. Liberty

Summit of Mt. Liberty
With my big trip to Iceland, I didn't go on my usual summer backpack trips, and I've been aching to sleep in the woods.  With the weather turning cooler, I decided I better get out before I lost my opportunity for the year.  Fortunately, my friend Jenny, took me up on a last minute invite to spend the night near the summit of Mt. Liberty at the Liberty Springs Tentsite.  We were rewarded with early fall weather, summit sunsets, and a pleasant hike. Here's how to recreate this adventure...

Adventure: Mt. Liberty Overnight Backpack
Jenny on the Liberty Spring Trail

Getting There:  Mt. Liberty is located along the famous and often visited Franconia Ridge in the White Mountains.  To get to the trailhead, I took I-93 north into Franconia Notch State Park.  You can park at either The Flume or The Basin parking area.  I choose The Basin.  Both parking areas are free to park and have pit toilets.  To access the trail, walk south on the paved bike path about 0.8 miles until you reach the Appalachian Trail/Liberty Springs trailhead.  Your hike starts here.

Trail:  We took the Liberty Springs Trail from the bike path all the way to the tentsite and summit.  This is also part of the Appalachian Trail and is marked with white blazes.  The first 0.6 miles gradually rises through a hardwood forest.  At 0.6 miles, you reach the junction of the Flume Slide Trail with the Liberty Spring Trail.  Many hikers choose to take this offshoot to the ridge at Mt. Flume and then loop back to Mt. Liberty.  I've tried it in the past and while it's enjoyable and fun, the Flume Slide Trail is challenging and difficult.  I decided it wouldn't be as fun with my large backpacking pack.

Loving Nature on the Franconia Ridge
From the junction, the trail gradually meandered up through the forest, crossing over a moderate river crossing (not bad in fall).  As we crossed into the boreal zone of conifers and evergreens, the trails steepness increased and the last 1.5 miles was like a long rock staircase.  The challenge of the hike came in the consistent steady uphill, but I would categorize it as fairly moderate since there was little to no slab or technical hiking involved.

At around 2 miles, we reached Liberty Springs Tentsite.  We checked in with the cartaker (still manned through September), paid our $8 a piece fee and were assigned our platform.  Due to to the high numbers of campers, we had to share a platform with another small tent.  Our AMC caretaker warned us of increased bear activity and reminded us to cook in the assigned area away from the tentsites and to keep all food and food-related materials in the bear boxes.
Rainy hike down...bring the right gear!

Jenny and I set up camp and left again to reach the summit.  Back on the trail, it was another 0.3 miles or so to the ridge junction.  From here, we turned right on the Franconia Ridge trail.  We hiked through low trees on a gradual rise until we popped out on the rocky summit of Mt. Liberty (about 0.3 miles from junction).  We reached the summit around 6:30 pm - just in time to admire the sun setting behind the western mountains.

We returned to camp, made our delicious dinner of burritos and settled into our tent for a cool night under the stars.

In the morning, we packed up and returned the same way - 2 miles back down the Liberty Spring Trail to the bike trail and 0.8 miles back up to The Basin parking lot.

Difficulty:  Moderate in fair weather

Bear Watch at Liberty Spring Tentsite
Distance: 5.2 miles on the trail (including summit) plus 1.6 miles on the bike path to the parking lot = 6.8 miles total.

AMC Liberty Spring Tentsite: The Appalachian Mountain Club maintains shelters and tentsites in the White Mountains.  During the busy season, a caretaker is there to help assign tent platforms, maintain the privy, and aid hikers.  There is an $8 fee per person.  This gives you access to the privy toilet (bring your own toilet paper!), bear boxes, and a water source.  In the summer the tentsites and shelters fill quickly, especially on weekends.  Make sure you get to your site early.  Even through it was mid-September, Liberty Spring Tentsite was completely booked by the end of the night.  We got there around 5 pm and there were still spots (although we had to share a platform).  This is a great way to backpack through the Whites with limited impact and guaranteed water/tentsite.

Recommendations:

- Check the Weather - Franconia Ridge is notorius for high winds and variable weather.  Although it was easily 80 F in The Basin parking lot, it was a cool 40 with windchill at Mt. Liberty summit.  We experienced hours of downpour overnight and woke up to drizzle in the morning.  Fortunately, we had checked the weather and were prepared with rain gear and warm layers.
View of Mt. Lafayette and Cannon Mountain from Liberty.

- Gear - Know what you need for an overnight.  Besides a tent, sleeping bag, and pad - overnight hikers need to be prepared with extra water, water purifier, stove, food, warm layers, and extra first aid materials.

Experiences sunset on the Franconia Ridge was a magical experience.  By spending a night up at Liberty Spring Tentsite, Jenny and I got to enjoy some of the best views and camping in the White Mountains at the beginning of fall.  I highly recommend a night near the ridge.

Please leave comments and questions below.  Don't forget to visit us on Facebook at https://www.facebook.com/TheFreelanceAdventurer

You might also enjoy...

Pemigewasset One Night Backpack

Baldface Weekend Backpack

A Night on Mt. Pierce

Happy hikers on the AT!


Monday, August 3, 2015

Lonesome Lake - The Perfect Family Hike

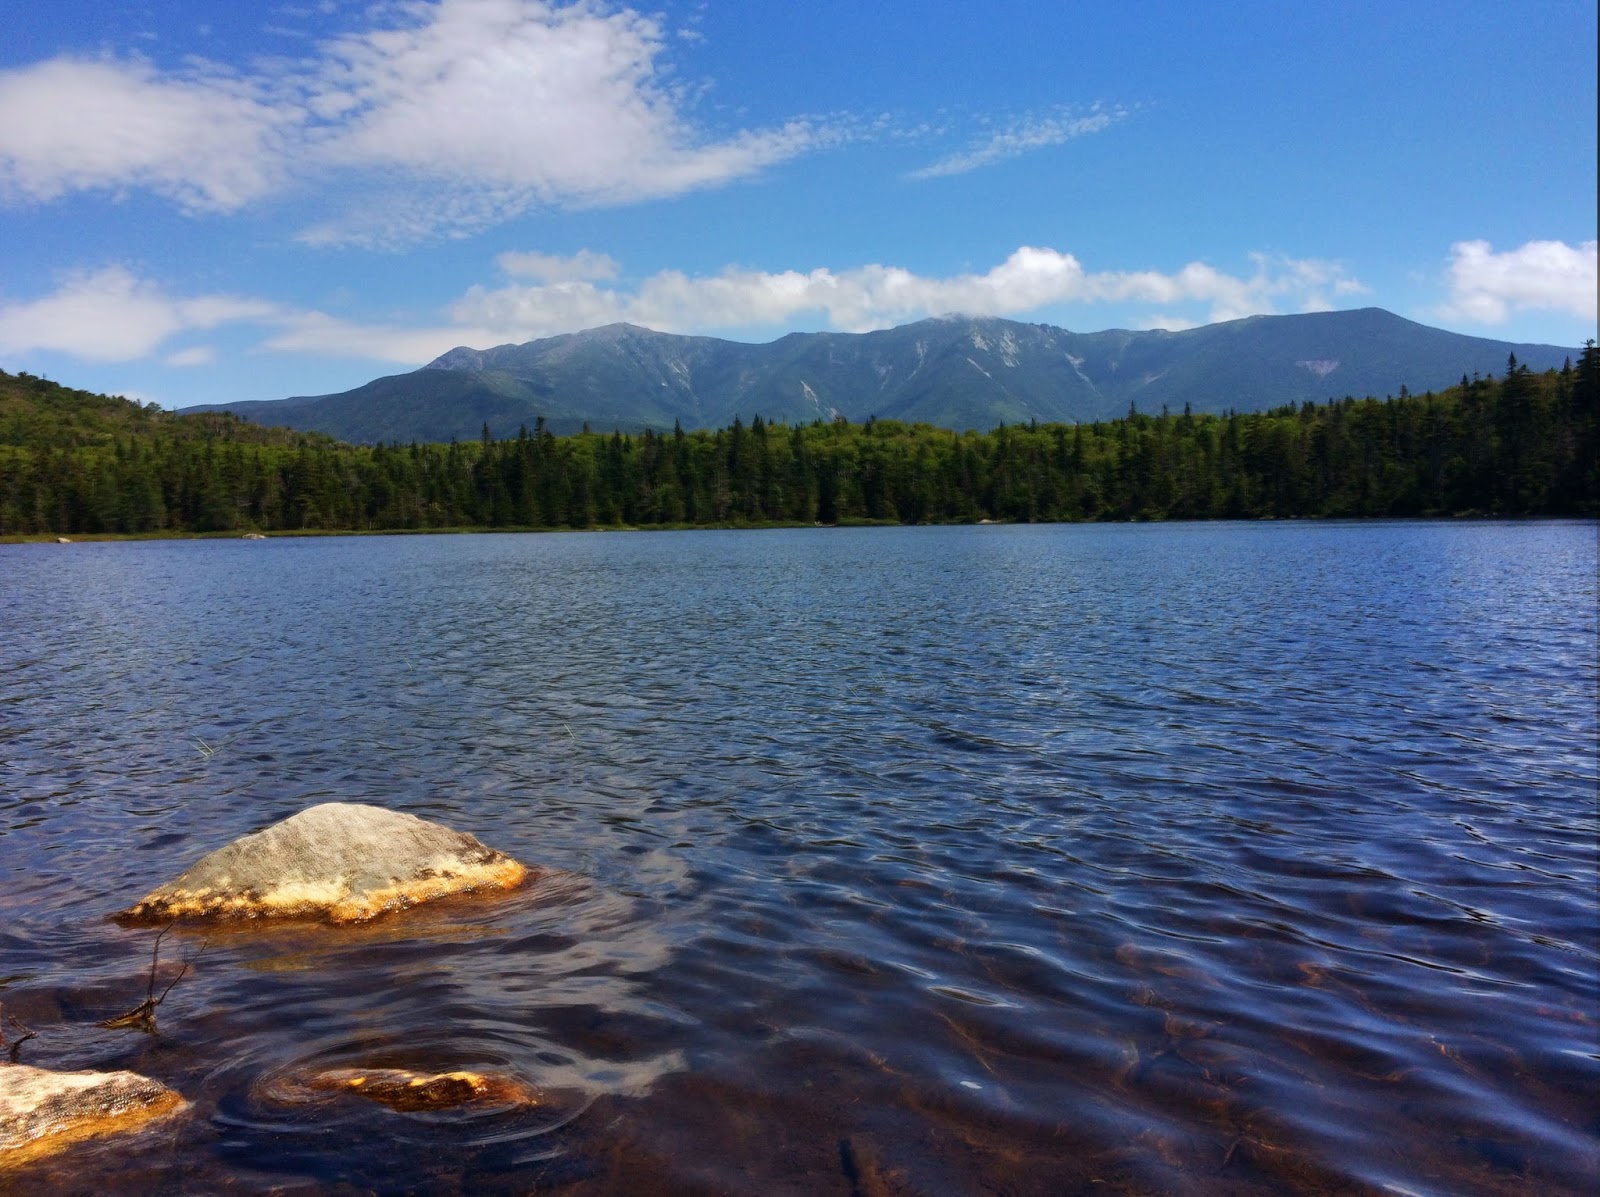
View of Cannon Mountain from Lonesome Lake

Lonesome Lake is a perfect hike for kids!
There are a million hikes to choose in the White Mountains - long, short, steep, flat, wet, dry - the list goes on and on.  But if you are planning a hike for a three-year-old, you need to choose wisely.  In my most popular post "5 Best Family Hikes in the White Mountains", I suggest this jaunt up Lonesome Lake Trail to mountain views, bog-bridge trails through meadows, and a comfy lunch spot at the AMC Hut.  It was time to put it to the test. On this perfect summer day, my friend Ingrid and I took her two kiddies - one-year-old Georgie and a three-year-old Ilsa to this iconic spot in New Hampshire's Franconia Notch.  Read below to replicate our adventure...

Adventure: Day Hike to Lonesome Lake

Ilsa crosses a small brook near the campground.
(Photo by Ingrid)
Getting There:  The trail-head for Lonesome Lake is located in the popular Lafayette Campground in Franconia State Park.  The campground is only accessible from a southbound exit on I-93.  If you are coming from the south (like I was), pass the area and take the Cannon Mountain exit, where you can get back on I-93 South.  The parking lot fills quickly on weekends, so plan to get there early.  If you can't, you can park on the I-93 north side at the Falling Waters Trail and take the under-highway tunnel to the campground.

Trail: From Lafayette Campground, take the Lonesome Lake Trail (yellow blaze).  After about 0.4 miles, the trail reaches a junction with the Hi-Cannon Trail.  Continue on Lonesome Lake Trail through hardwood forest.  The trail is uphill but moderate - giving hikers stone steps to help them up steep sections and even a few switchbacks (unusual in the Whites!)  Continue another 0.8 miles (1.2 total now) to the east side of Lonesome Lake.  Take a left and travel Around Lonesome Lake Trail- getting glimpses (and sounds) of the lake and shore.  After about 0.4 miles, you will pass over a bridge that gives clear views of Cannon Mountain mirroring on the clear lake before reaching the platform/beach area and the stairs to the hut.
Ilsa enjoys a swim at Lonesome Lake (photo by Ingrid)
In the summer months, the beach area is a perfect spot to rest or swim in the summer time.  On a hot weekend day, plan on sharing the area with 10-20 people who share your love of nature.  From the swimming area, visitors can get a clear view of Franconia Ridge in the distance.

Bog Bridges Around Lonesome Lake Trail.

Don't forget to visit the hut for a cookie or cup of hot chocolate (and possible bathroom break) before continuing around the lake.  From the swimming area and hut, continue on the Around Lonesome Lake Trail another 0.4 miles onto a path of bog bridges that travels over fragile meadow and wetlands.  Sneak a peak in the small streams and you might see some small trout swimming in the shallows!  As Ilsa informed us, "It looks like a fairyland!"

Soon, you'll return to the junction with Lonesome Lake Trail.  Return the way you came.  If you are a lucky little girl, you might have your Auntie Lindsey carry you down so you can rest your little legs.  Back at the campground, use the restroom before returning to the car for the ride home.

Difficulty: Easy to Moderate

Distance: 4.2 miles round trip including doing the perimeter of the lake.

Recommendations:
Summit gets a swim in too!

- Set up your children for success.  Get them excited about their hike - tell them what they might see, what the trail will be like, etc.  Bring trail snacks, treats, a toy, and a change of clothes and towel (for swimming).

- Young children should not carry a backpack (unless they ask to).  Make the experience lighthearted and fun.  Give positive affirmations for good hiking behavior.

- Bring a back up carrier for little kids.  Our three-year-old hiker rocked the hike up (with a couple candy bribes and many stops), but was pooped for the downhill.  We were prepared with a backpack child carrier.

- Take advantage of the hut bathrooms and rooms to allow children to comfortably change clothing.  You can also refill potable water here.

- There is no charge for parking.

- Get to the parking lot early on summer weekends.  It fills quickly!

- Check the weather - the White Mountains are prone to afternoon thunderstorms and variable weather.  Plan ahead and be prepared!
Kids hang out at base of AMC hut.
(Photo by Ingrid)

It was a PERFECT day in the White Mountains -  clear, sunny, warm (but not hot), and not humid.  We all enjoyed our hike up the shaded trails of Lonesome Lake Trail to the sunny swimming beach at the hut shore.  If you are looking for a great kid-friendly hike or just a moderate hike of your own, you won't regret spending your day in Franconia Notch's Lonesome Lake.

You might also enjoy the following posts:
-  Sugarloafs - 2000 footers with Outstanding Views
-  Best Family Hikes in White Mountains, NH
- Livermore Trail - Easy Multi-use trail in the White Mountains

Please leave any questions and comments below.  Don't forget to like The Freelance Adventurer on Facebook and on Instagram @FreelanceAdventurer.

View of Franconia Ridge from west side of lake.

Thursday, July 30, 2015

The Best Road Trip - 15 nights in Iceland - Cost, Advice, and Itinerary

Godafoss Waterfall, Iceland
Hard to say something is the best, right?  I mean, I've been on some pretty awesome road trips - Newfoundland, California, Colorado, Michigan, Pacific Northwest, Southwest National Parks, Ireland....the list goes on and on.  But I can say - Iceland trumps them all.  The natural beauty is incomparable - it's AMAZING! Combined with the ease of foreign currency (all you need is a credit card), the delicious food, and the tourist-friendly attitude, makes this island THE BEST place to visit.  Yes, it's cold.  Yes, it's rural. No, there are no beaches to lay out in a bikini.  It's not that kind of vacation.  If you are looking for a natural wonderland and long roads where the only traffic is the sheep and horses on the side of road, then go here.  Below you'll get a review of our 15-night itinerary as well as some tips and tricks for your trip.  Happy Travels!

Dynjandi Waterfall, Iceland

THE BEST ROAD TRIP - 15 Nights in Iceland 

Outside of Reykjavik 
This trip wasn't cheap...but it was cheaper than I expected.  With a day job as a middle school science teacher, I don't have a huge slush fund for travel.  However, by saving $100 from each paycheck for three years (money that should have probably gone into some sort of Roth IRA retirement account), I saved $5,000 - my expected cost.  As it turned out, the trip cost - for everything - about $4,000 a person (3 person trip).  This included...

$760 - Round-trip Direct Flight from Boston
$1,936 - Payment to Iceland Unlimited (2 week budget car rental, 15 night budget accommodations, Ferry to Westfjords, Whale Watch Trip, Blue Lagoon Entrance, and Travel Agent Services [24-hour contact, map, meeting, cell phone, gps])
$421 - Expenses - 1/3rd of the gas, snacks, souvenirs, snacks
$569 - Food and Drink (Lunches and Dinners only. Breakfast was always included by guesthouses.  We often only went out for one large meal a day to save money)
$300 - Extra Excursions (Horseback Riding, Silfra Snorkel, Glacial Bay Boat Tour)
$160 - Third of cost for broken windshield (cracked along trip and had to replace)
______
TOTAL: $4,146

And it was worth EVERY PENNY!  I'm starting to save for a return trip (the Roth IRA can wait...)

5 Things I didn't know until I went to Iceland...

Hraunfossar waterfall
1.  There are waterfalls EVERYWHERE. - Yes.  I knew there were waterfalls there.  I had done my photography research on Godafoss, Gullfoss, and all the other "fosses".  What I didn't realize is that you can't throw a puffin in this country without hitting ten waterfalls.  Driving along fjords all day, we'd see literally hundreds of falls coming off the mountains and draining into the fjord.  It was amazing and beautiful.  Perhaps next time I go, I'll try to stop more often for the "little ones" (they aren't little by US standards) and spend less time at tourists favorites.


Lupines Everywhere!
2. In July, the country is covered in lupine flowers, sheep, and horses. - Oh my goodness! The beauty!  It's hard to describe, but we would drive for a full day through what looked like one massive field of purple lupines.  It's memorizing.  Icelanders also have large herds of sheep and horses that roam freely through the island.  Every glance is picture-perfect.


3.  Everyone speaks English. - Well, ok...I DID meet one woman who didn't at a rural gas station in North Iceland, but everyone else in the gas station did.  Since there are so many European tourists, English has become the "tourist language" and most menus, products, and signs were in English - even in rural areas.
Walking on ice - bring a jacket

4. The food is good. - I had expected food choice would be limited due to the remote and isolated location.  We found that restaurants served excellent and diverse menus.  Portion size was fair and so was cost.  Remember, you don't tip your servers in Iceland and tax is included in the cost of the food, so a $30 meal isn't that bad when you consider it includes tax and gratuity.  Oh...we also noticed there are a lot of pizza places.

5.  It's chilly. - I mean, I knew this I guess.  The summer prior, I had kept pretty close tabs on the daily weather in Reykjavik, but it was still surprising to be mid-July with a high of 55 F.  Bring lots of layered clothing and sunscreen.  The harsh northern sun will get you. Don't forget your swimsuit too - Hot tubs everywhere!

And now for the itinerary ... Click on the day and follow the link to the write up about that day.  


15 Nights in Iceland (in July)

Day 1 (July 8) - Blue Lagoon and Reykjavik Introduction - Arrive in Iceland at 6:30 am. Take Flybus to Blue Lagoon for opening at 8:30 am.  From Blue Lagoon, take Flybus to Reykjavik.  Check into Guesthouse Aurora and explore local spots.

Day 2 (July 9) - West Iceland - Lupines, Waterfalls, Hot Springs, and Craters 
- Get rental car from Enterprise and drive west.  Explore Hvakfjordur fjord and the Glymur waterfall. See other sights along the road. Stay at Hotel Borganes.
Day 3 - Snaefellsnes Peninsula

Day 3 (July 10) - Snæfellsnes Peninsula - Beaches, Churches, and Mountains -  Explore the Snaefellsnes peninsula and glacier.  Stay at Guesthouse Kast.

Day 4 (July 11) - The Wild Westfjords - Winding Roads, Mountains, Puffins, and a Ferry-  Take 9 am ferry  in Stykkisholmur alon Breidafjordur bay.  See Latrabjarg cliff and puffins!  Stay at Radagerdi hostel in Patreksfjordur.


Day 5 (July 12) - Westfjords Waterfalls and Coastal Villages  - Explore more of the Westfjords including Patreksfjordur, Talknafjordur, and Bildudalur.  Visit the Dynjandi waterfall and Isafjordur.  Stay at Hotel Edda Isafjordur.

Day 6 (July 13) - Westfjords Continued - Hot Tubs, Waterfalls, and Sorcery -  Explore the capital of sorcery and witchcraft while exploring more fjords and beauty.  Stay at Guesthouse Laugarholl.

Day 7 (July 14) - Northwest Iceland - Black Beaches, Driftwood and Icelandic Horses- Drive by fertile farmland and barren mountains roads.  Take an afternoon tour on Icelandic horses.  Stay at Guesthouse Holar. 

Day 8 (July 15) - Akureyri - Shopping, Food, and Drink - Drive to the capital of the north.  Explore the town and stay at Guesthouse Gula Villan.

Day 6 - Drangsnes Hot Tubs


Day 9 (July 16) - North Iceland - Whales, Waterfalls, and Nature Baths - Head for Lake Myvatan.  On the way stop and see Godafoss waterfall.  Go on 3 hour whale watching tour in Husavik.  Stay at Guesthouse Stong.

Day 10 (July 17) - Myvatn - Craters, Sulfur Pots, and Steam Vents - Drive to Eastern Iceland.  Stop to see Dettifoss - Europes most powerful waterfall.  Stay at Icelandair Hotel Herad.

Day 11 (July 18) - East Iceland - Hot Tubs, Lobster, and (more) Waterfalls - Drive through East Fjords and fishing villages.  Stay at Guesthouse Arnanes. 

Day 12 (July 19) - Southeast Iceland - Icebergs and Glaciers - See glacial lagoon through a boat tour.  Explore Vatnajokull National Park, Svartifoss Waterfall, and Vik.  Stay at Hotel Edda in Skogar.

Day 13 (July 20) - The South Coast - Waterfalls, Waterfalls, and Snorkeling - Drive the south coast and stop to see many waterfalls including Seljalandsfoss and Gljufrabui. Snorkel Silfa in Thingvellir National Park. Spend the night at Guesthouse Lambastadir. 

Day 14 (July 21) - The Golden Circle - þingvellir National Park, Geysers, and Gullfoss - Visit Thingvellir National Park.  See geysers and Gullfoss waterfall.  Return rental car and stay at Reykavik Hostel Village.

Day 15 (July 22) - Reykjavik- Hot Dogs, Happy Hour, and Sunshine City- Enjoy the last day in Iceland by exploring Reykjavik on foot. 

Day 16 (July 23) - Fly home - Morning flight back to Boston.


Day 12 - Glacial Lagoon
In conclusion, this trip might have been a "once in a lifetime adventure", but I can't accept that.  I HAVE to go back!  Who needs a retirement plan anyhow?

Please leave any questions and comments here.  Don't forget to like The Freelance Adventurer on Facebook and on Instagram @FreelanceAdventurer

Westfjords Selfie

Wednesday, July 22, 2015

Day 15 & 16 - Reykjavik- Hot Dogs, Happy Hour, and Sunshine City

Laugavegur Street, Reykjavik
The weather gods smiled upon us on our last full day in Iceland.  Sunshine and warmth (well...60 F) made the city come even more alive.  We had a few things left on our Iceland bucket list including eating a hot dog from a food cart, some last minute shopping, and a splurge of a dinner.  Here is how we accomplished this...

Day 15 & 16 - Reykjavik- Hot Dogs, Happy Hour, and Sunshine City
Hot Dogs at Baejarins Beztu Pylsur.  Notice the line behind them.

Our day began with breakfast at our hostel followed by a walk around town.  We were fortunate that our hostel was located right at the start of the popular shopping street Laugavegur.  This street has gift shops, boutiques, cafes, bars, and many parts is for pedestrian traffic only.  Our goal was to work down Laugavegur towards a popular hot dog cart - Bæjarins Beztu Pylsur.  The place is known as good bite, and consistently has a line of 5-25 people.  I ordered two dogs with "the works".  This included ketchup, mustard, friend and raw onion, and remoulade (sweet mayo dressing).   They were delicious!

Enjoying the sunshine and a mocha at Uno
After the dogs, we went to Uno for coffee.  We stopped here because it was a warm, sunny day (I was down to only one long sleeve layer!) and they had patio seating.  We enjoyed people watching and sipping our hot drinks.

From there, we took a long, out-of-the-way walk back to the hostel.  I wanted to walk through Hljómskálagarður - a town park and small lake within the city.  It was such a beautiful day that walking outside was a perfect way to explore and get some Vitamin D.

Back at the hostel, we researched restaurants for our last Icelandic dinner.  We settled on seeking out Snaps - rated by one magazine as "The Best Goddamn Restaurant".  We also researched happy hour spots and found out that Apotek- a swanky restaurant and bar - had 1/2 off cocktails during happy hour.  Sold!


Dinner at Snaps

Another 10 minute walk and we reached Apotek where we enjoyed gourmet cocktails in their comfortable and stylish lounge.  Afterwards, we walked 5 minutes to Snaps.  Word of caution - make reservations for Snaps.  We hadn't thought of this, but we were informed they were entirely booked.  Fortunately, there was room at the bar, so we all enjoyed a meal there after all.  I felt the menu had a French influence and I enjoyed my mussels, fries, and house red wine.

After dinner it was time to return to the hostel and pack up.  The next morning, we took an early FlyBus from our hostel to the airport.  It was time to go home.
Walking through Hljómskálagarður park.
What a trip!  It was great to have one extra day in Reykjavik to unwind and explore.  I feel extremely grateful and humbled that I was able to travel 15 nights through Iceland with two wonderful women.  Thank you Leanne and Ali for being the most fun, relaxed, and easy companions.  It's so much better to go to an amazing place and have someone to share experiences with.  I'm also grateful for the work done by Linda at Iceland Unlimited.  She gave great advice, was accessible and easy to communicate with, and found us budget accommodations near amazing locations.
The map we got from Iceland Unlimited with our highlighted route (pink) and interesting sites hand written in blue and green.  What a help!  Thanks Linda!!!
On most of my annual girls trips I know that, realistically, I will not be back to that location. Even though this trip cost three years of savings, I REFUSE to accept that I will not return.  Iceland will haunt my travel dreams for the rest of my life and I will continue to plan a return.  Until next time... "Kveðja".
Farewell, Iceland.  Thanks for the memories and magic!  ~ Lindsey, Leanne, and Ali


Please leave comments or questions below, or visit us on our Facebook page at The Freelance Adventurer for more photos and stories or visit us on Instagram @FreelanceAdventurer.